

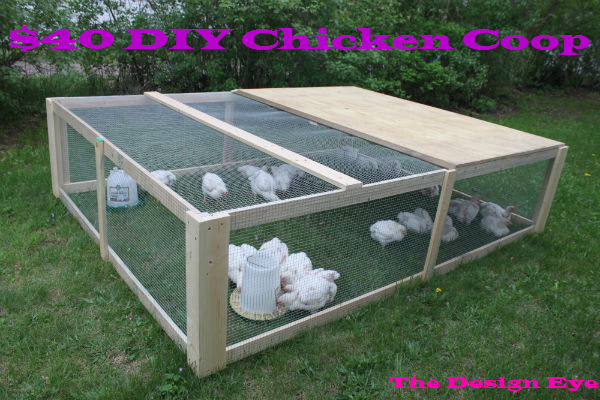
When we initially built the $40 Chicken Coop in May of last year, we thought about putting wheels on it to help with moving it around the yard. Like most projects we get into, however, we were racing to get the coop built before our meat birds were ready to go outside and just didn’t have the time.
It turned out that the coop was actually pretty light and could be skidded through the yard without too much fussing. Besides, we only have the meat birds in there for a few weeks before they’re ready to be butchered, so, by the time we figured out the intricacies of adding wheels, the coop would be in storage for the winter.
This year we’ve got another 25 meat birds and a plan that’s going to save my back!
Adding Wheels to the Chicken Tractor:
My Father-in-law gave us a set of wheels from an old air compressor this spring. He must have grown tired of my complaining… Or, perhaps it was because they were in charge of moving the coop while we were gone on vacation for four days. Naturally, we waited until after we returned from vacation before installing the wheels.
Our plan was to use the two wheels on the heavy end of the coop and put a handle on the light end. A 2×4 cut about 24″ long would serve as a swing arm for each wheel. A single 9/16″ bolt through the middle of the 2×4 and into the coop allows us to adjust the rolling height as well as drop the coop down to the ground while at rest.
Here’s a picture of the wheel in the rolling position: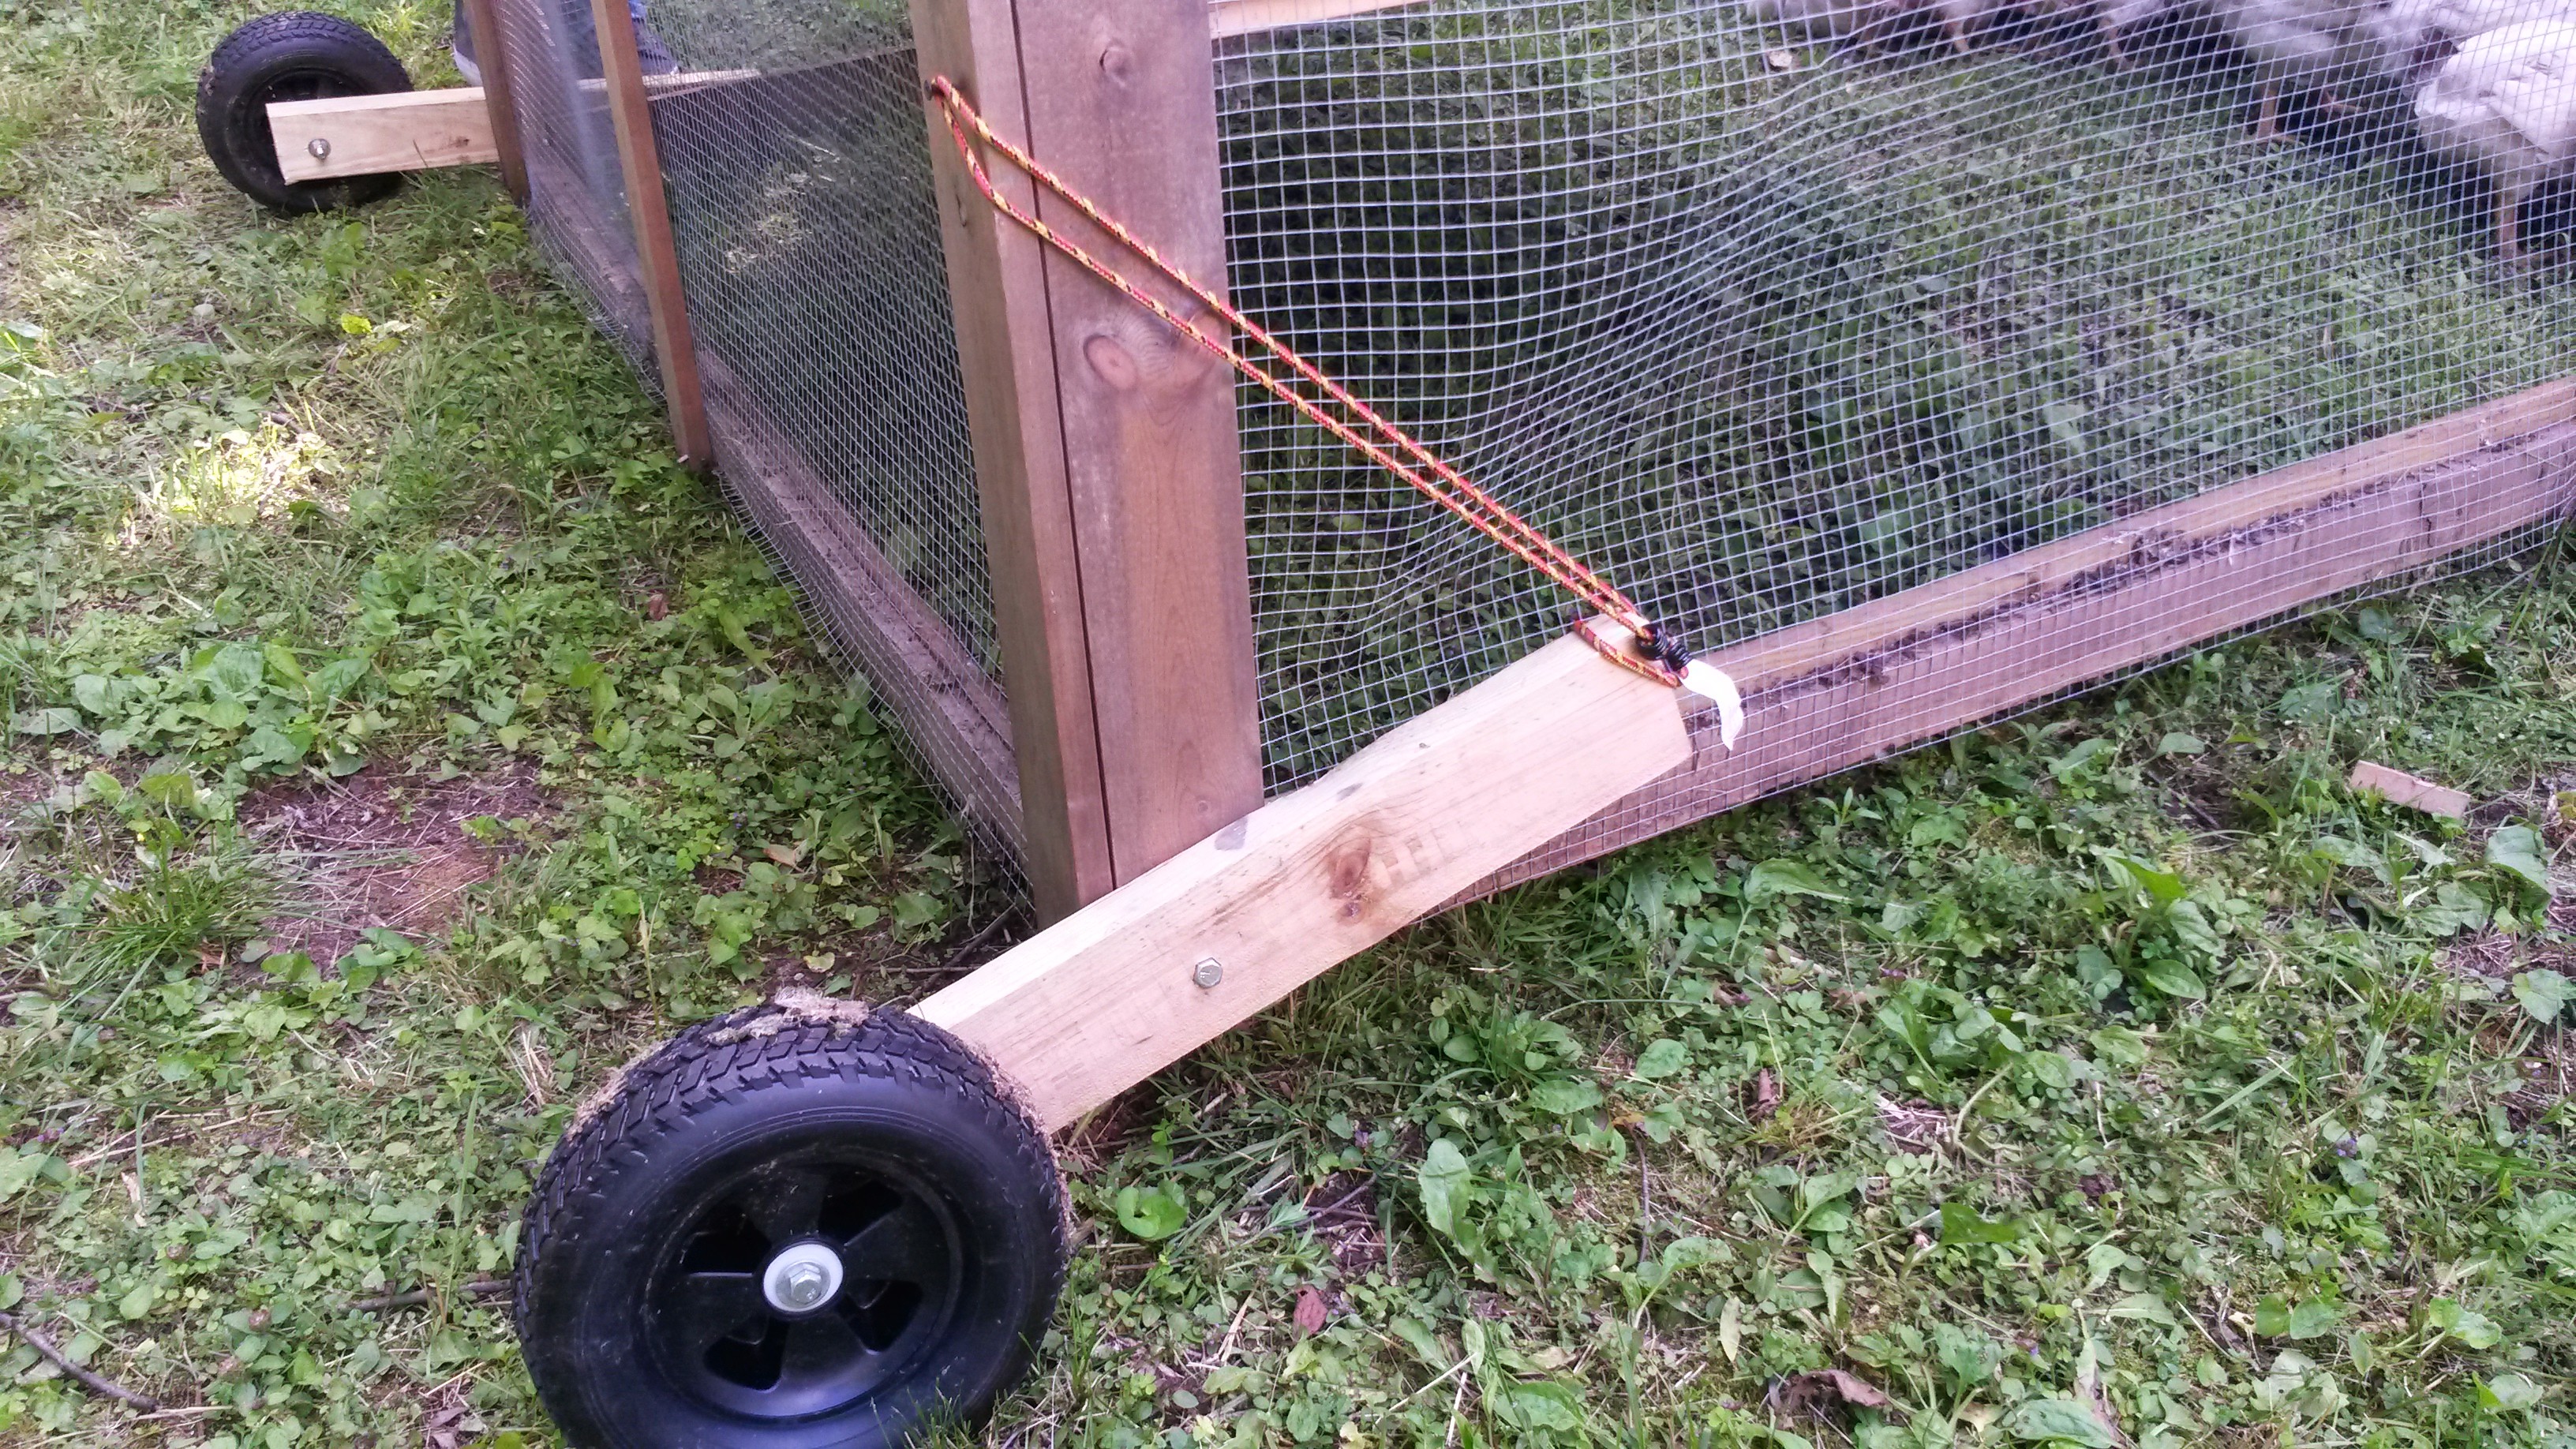
And a picture after dropping the coop back down: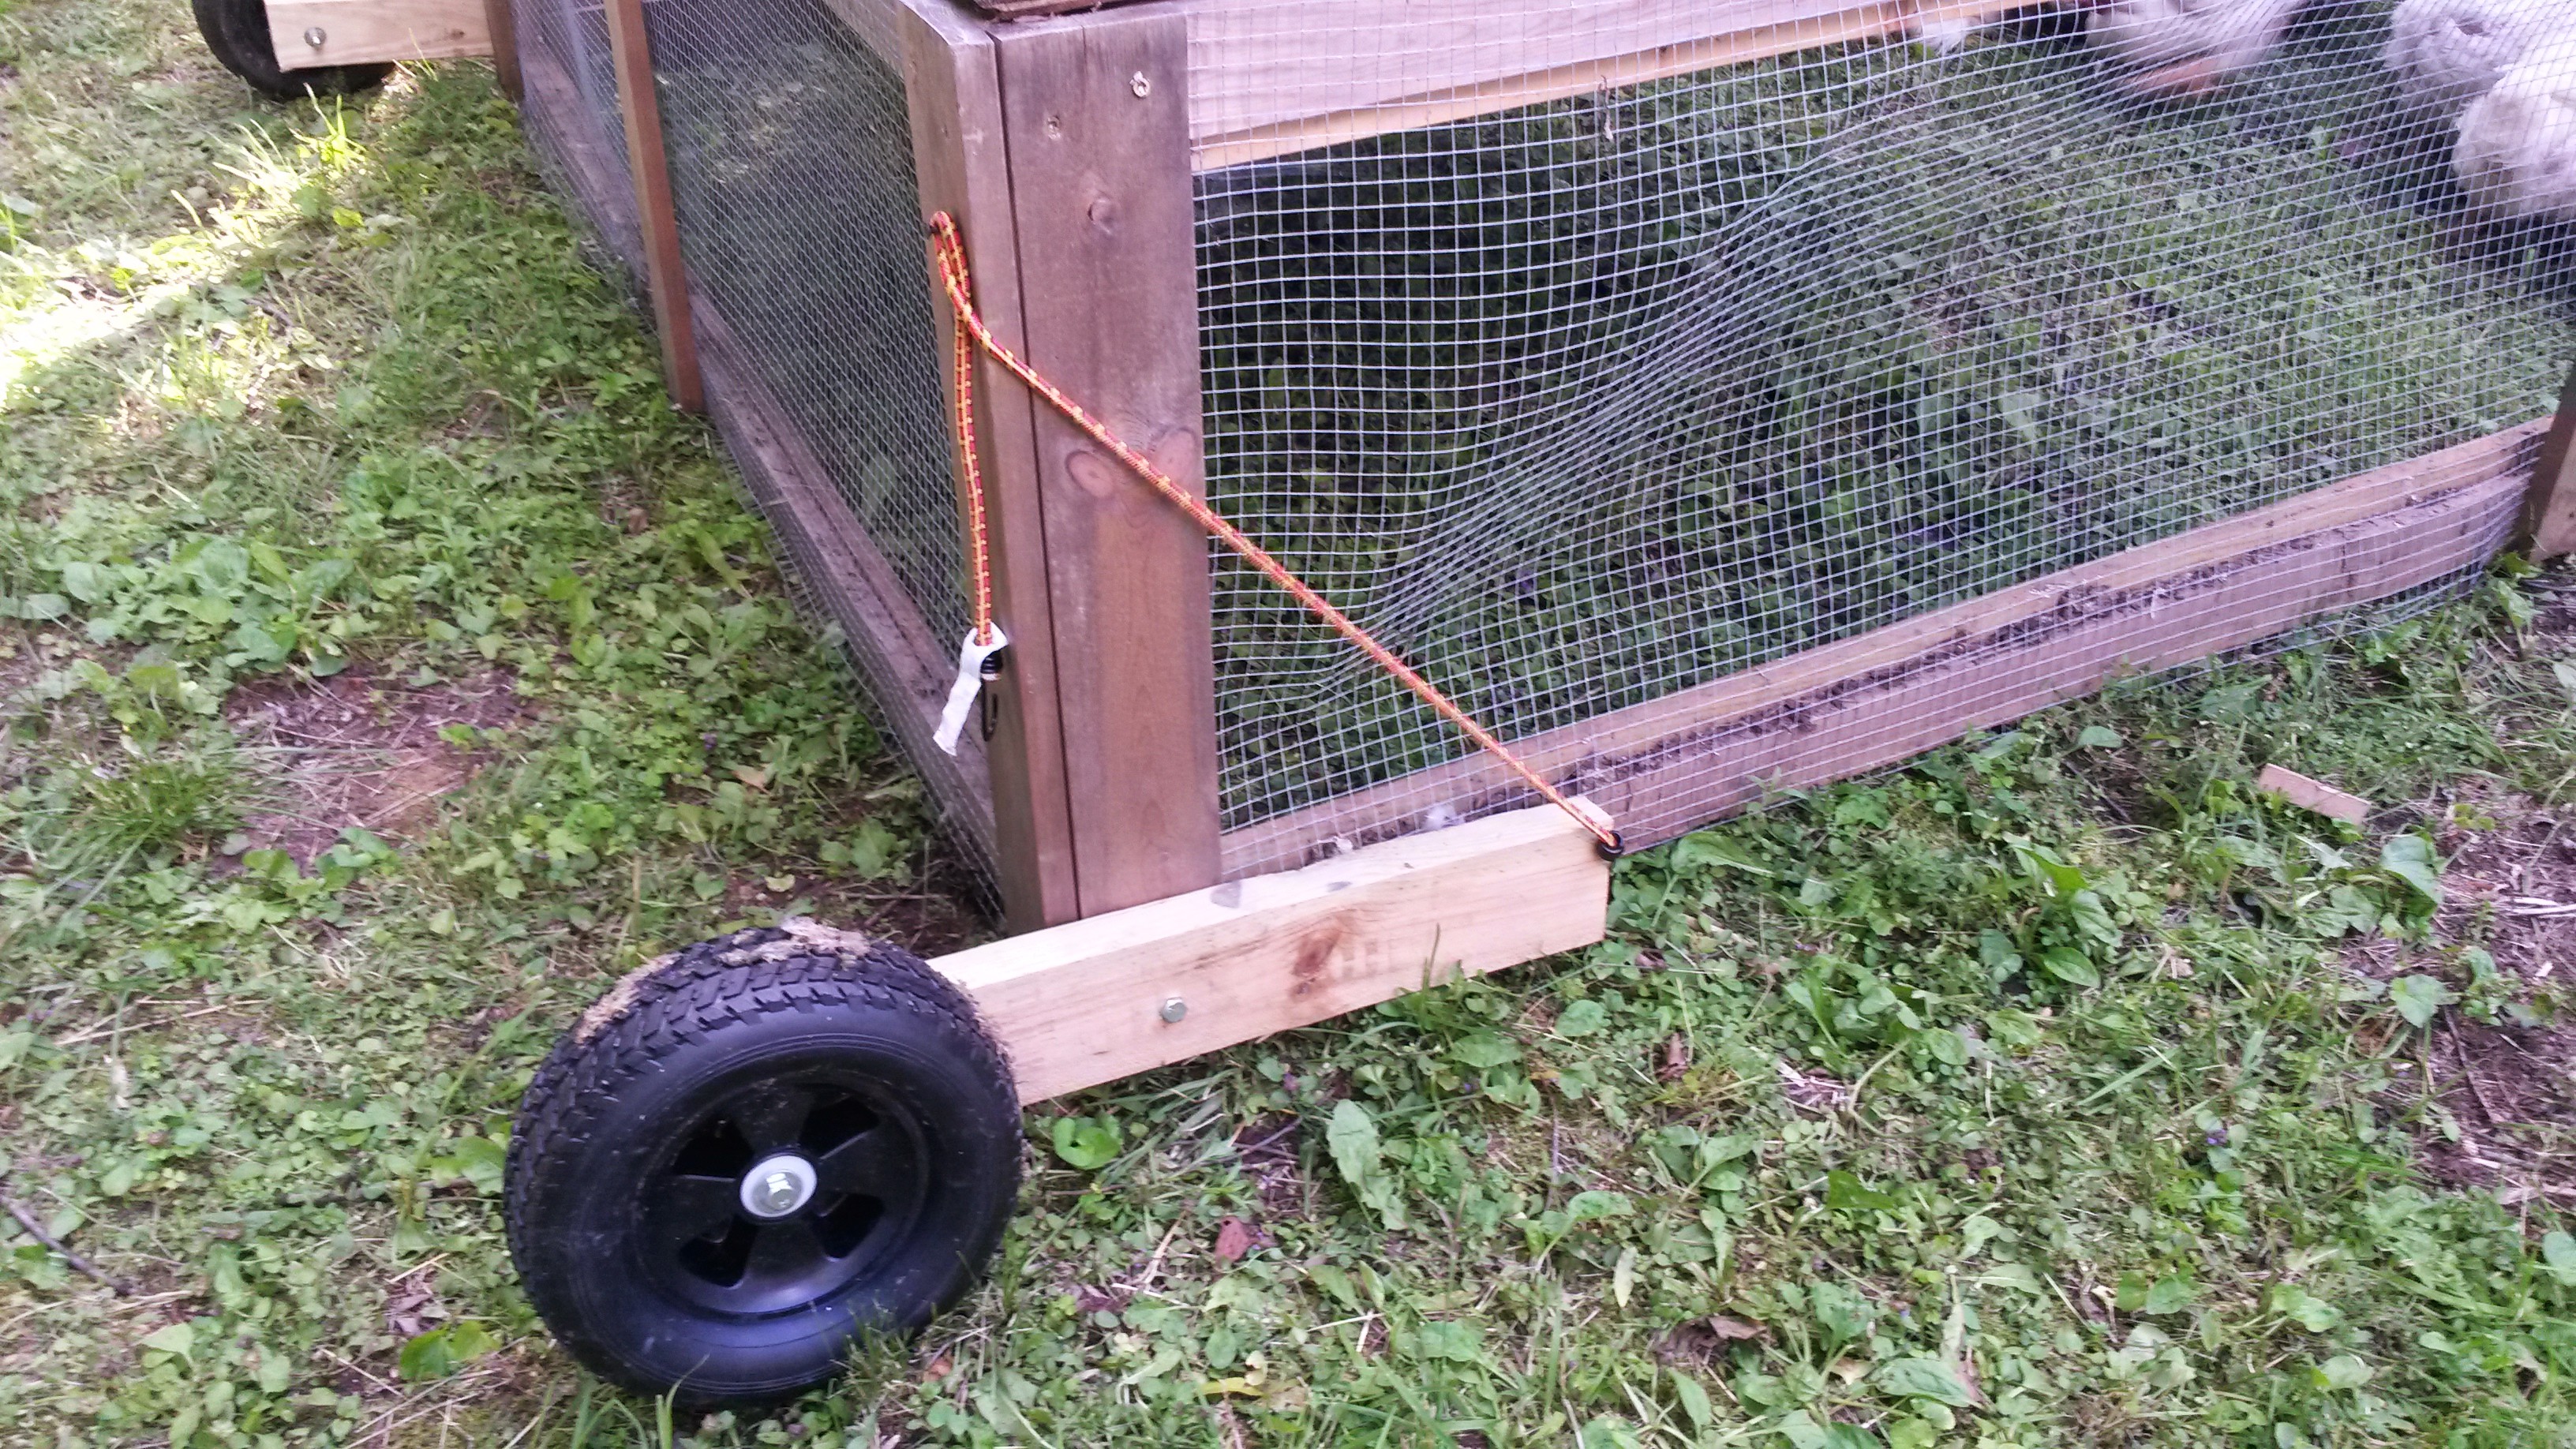
This setup works extremely well and I love how adjustable it is. Why didn’t we do this earlier!?
Hope you enjoyed the post! Let us know how you added wheels to your chicken coop in the comments below!
- Chicken Tractor Modification - July 17, 2014